
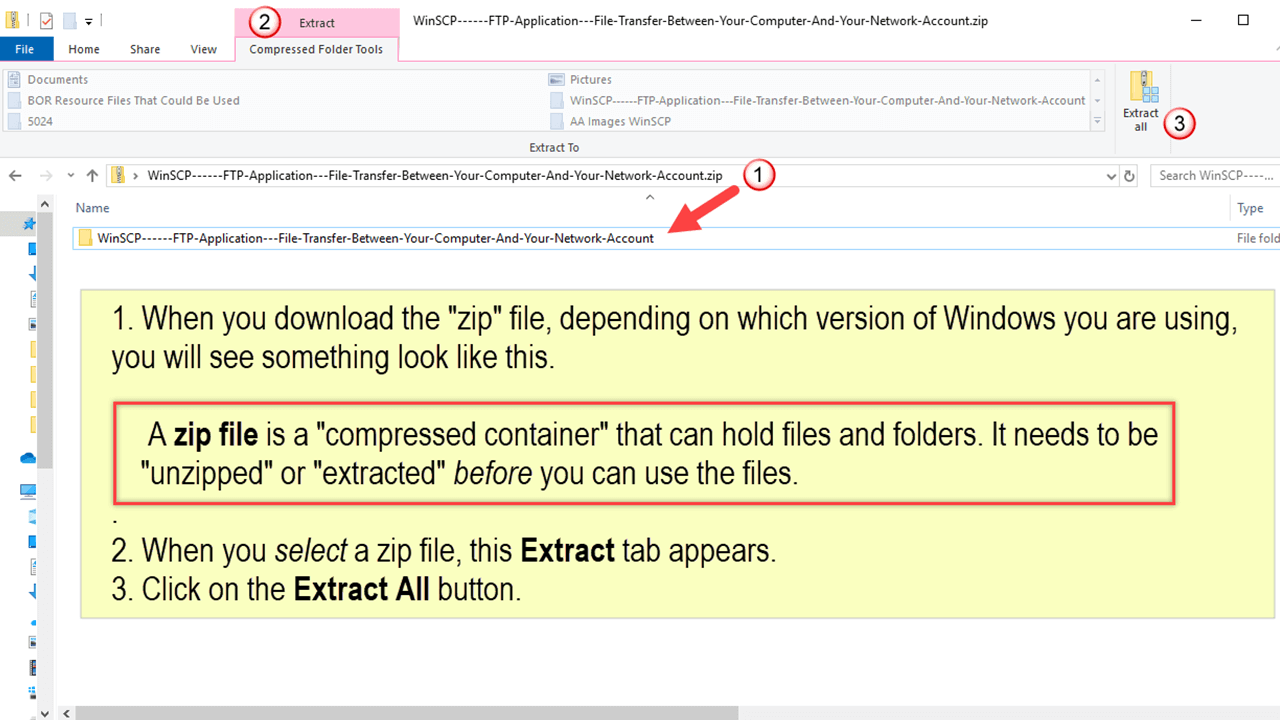
"Unzip" the downloaded zip file. TIP: Save the unzipped contents to a USB flash drive. Why? You can run WinSCP on a Windows computer without installation. It's a "portable" version of WinSCP.
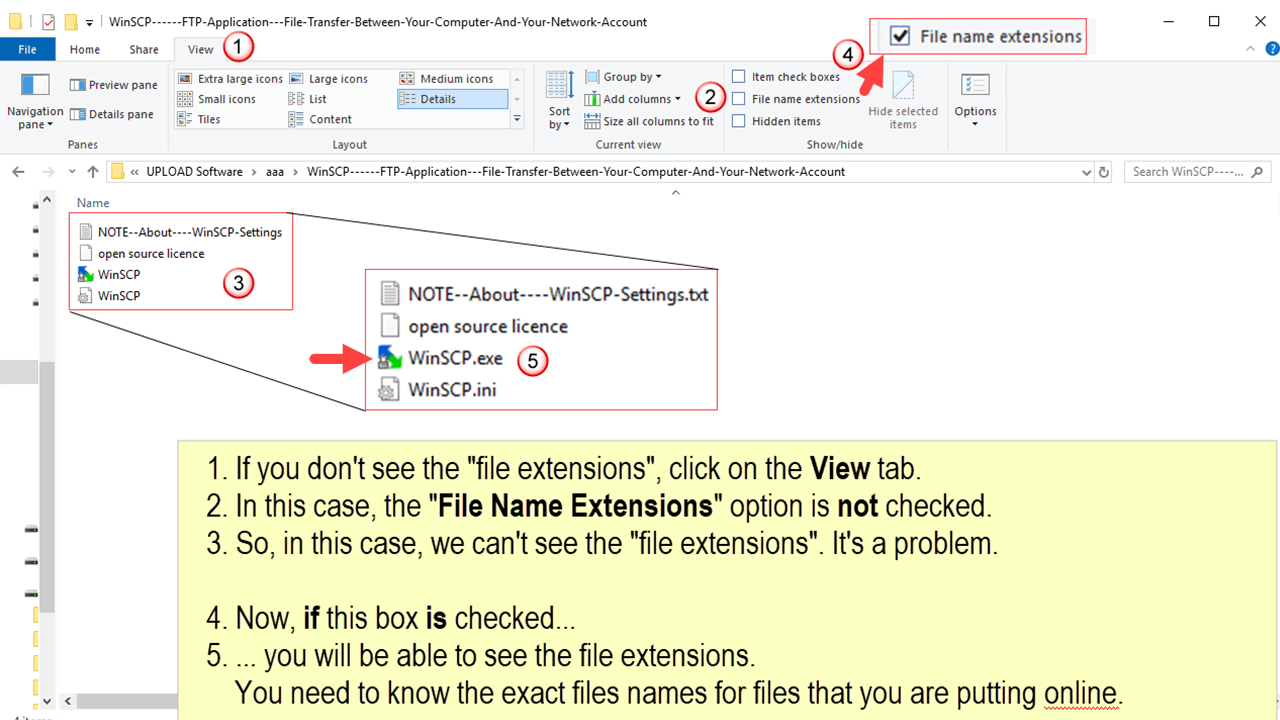
When using online files, you need to know the exact file name; that includes the file extension. As a habit, turn the display of file extensions "ON". It's important for creating links to your online files.
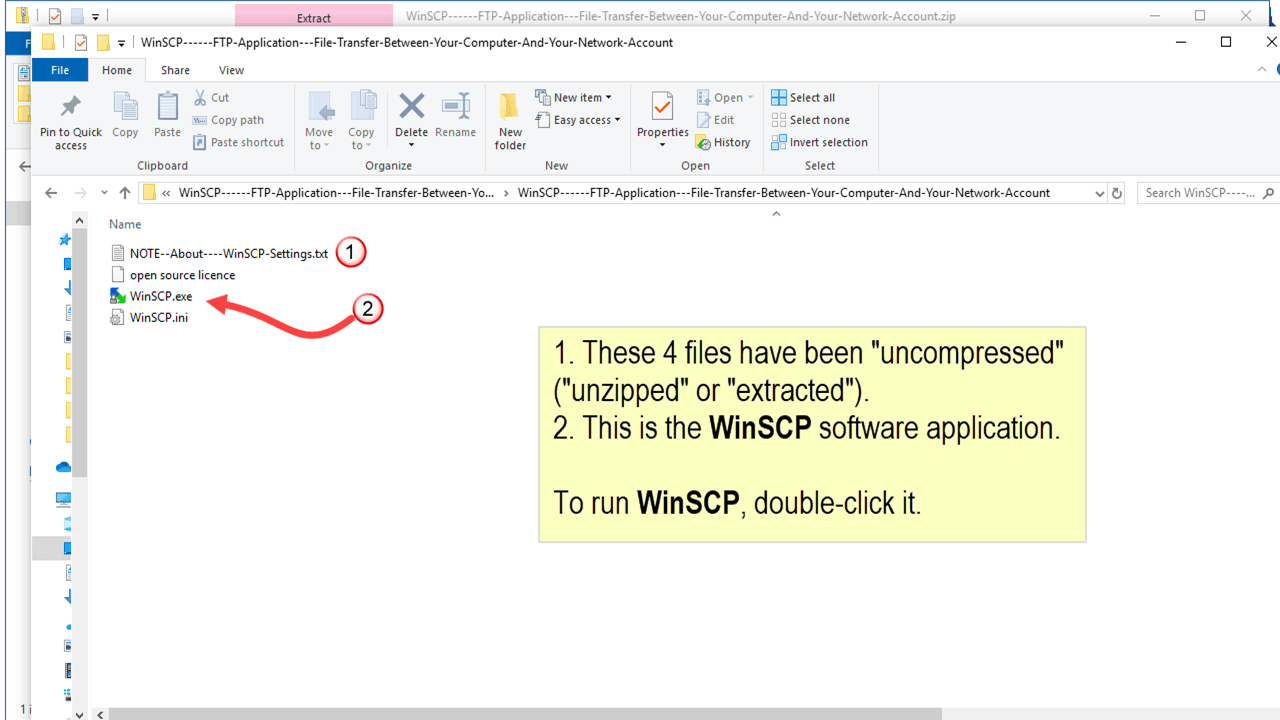
In this version of WinSCP, you can run the software on a Windows computer by double-clicking on the WinSCP.exe file, even when the software is on a USB flash drive. No installation is required.
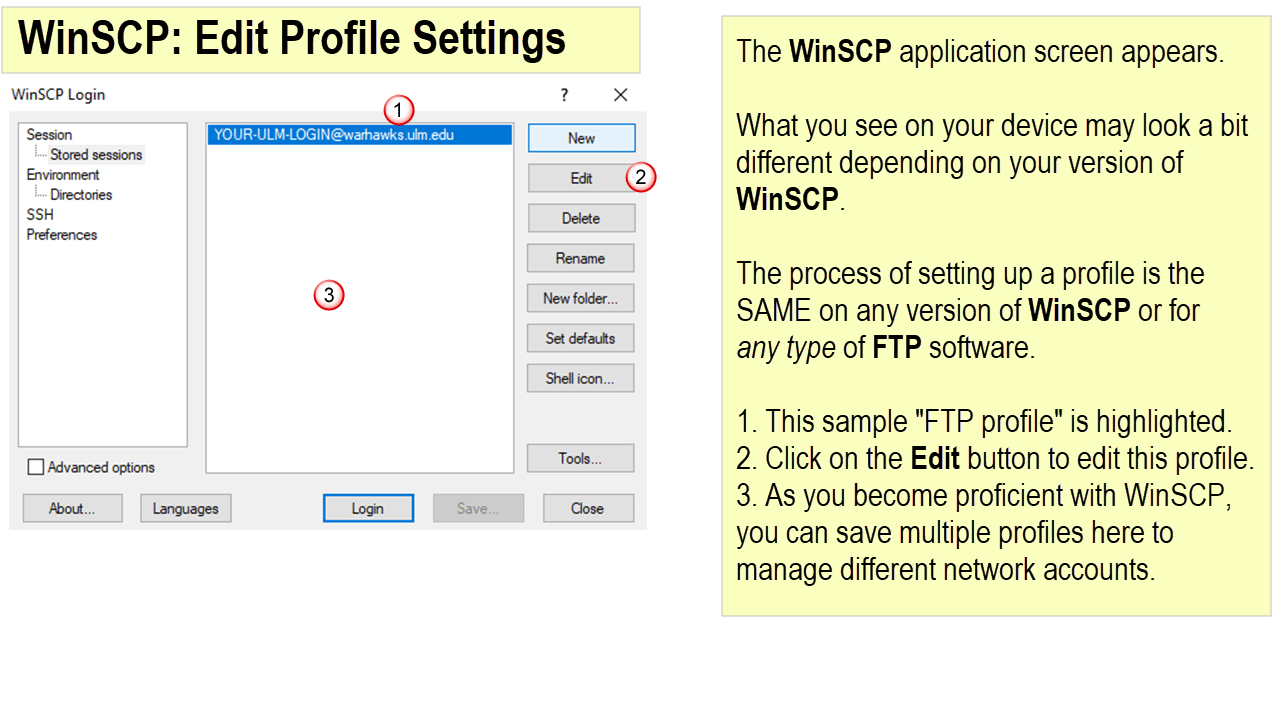
The display of your version of WinSCP may look different. If so, that's fine.
You need to create and save the session or profile just once. After that, it's easy to open your profile and access your network account with WinSCP.
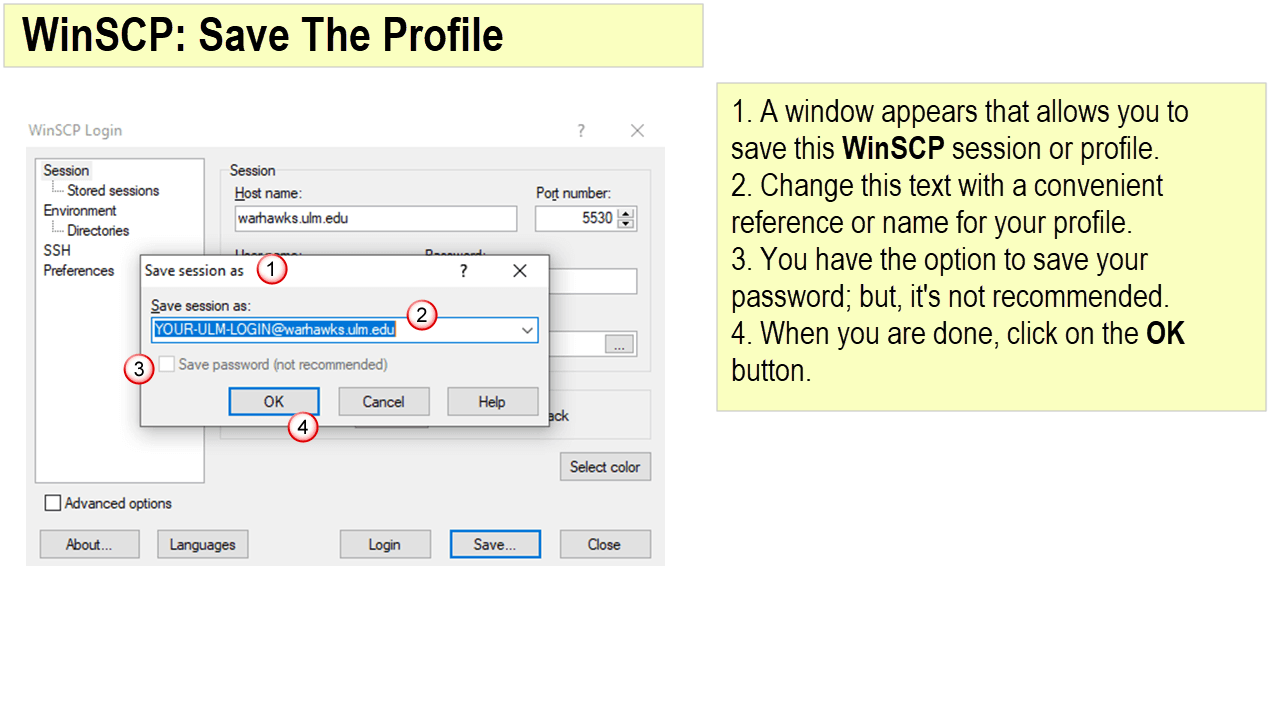
Use any profile name you like when you save your profile.
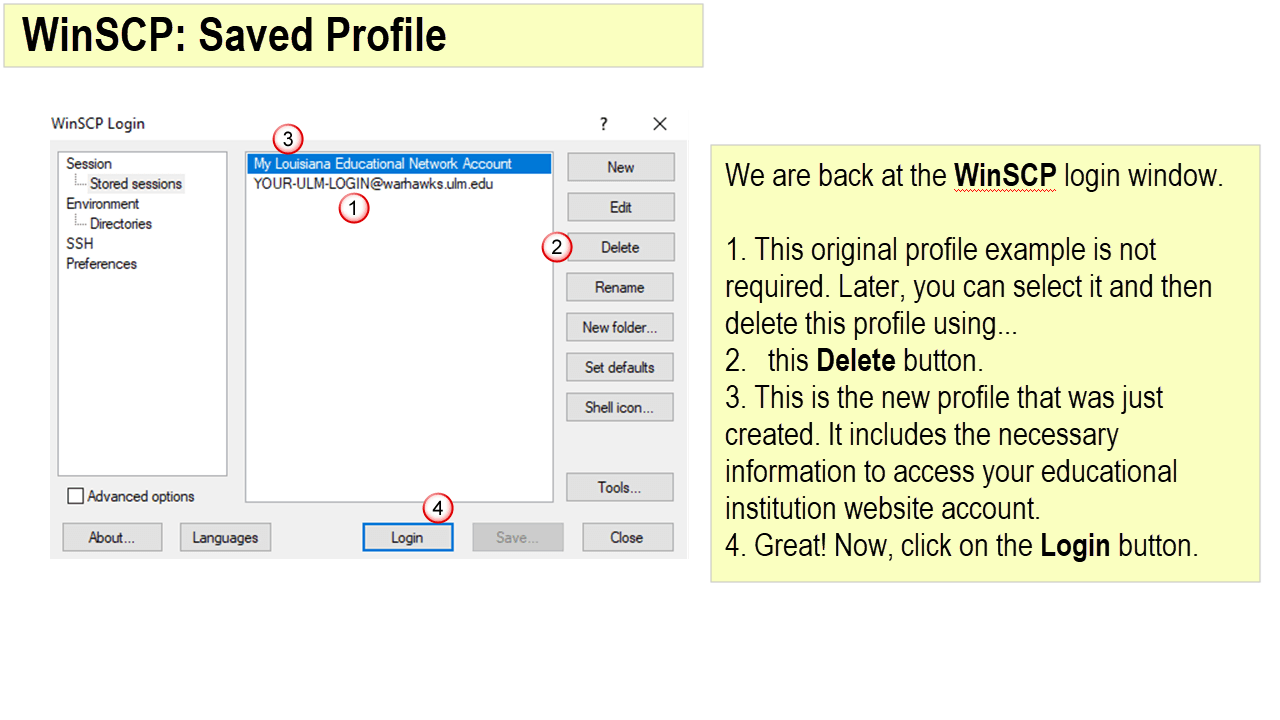
This is what a saved profile looks like. Notice that WinSCP allows you to save quite a few profiles of different network accounts.
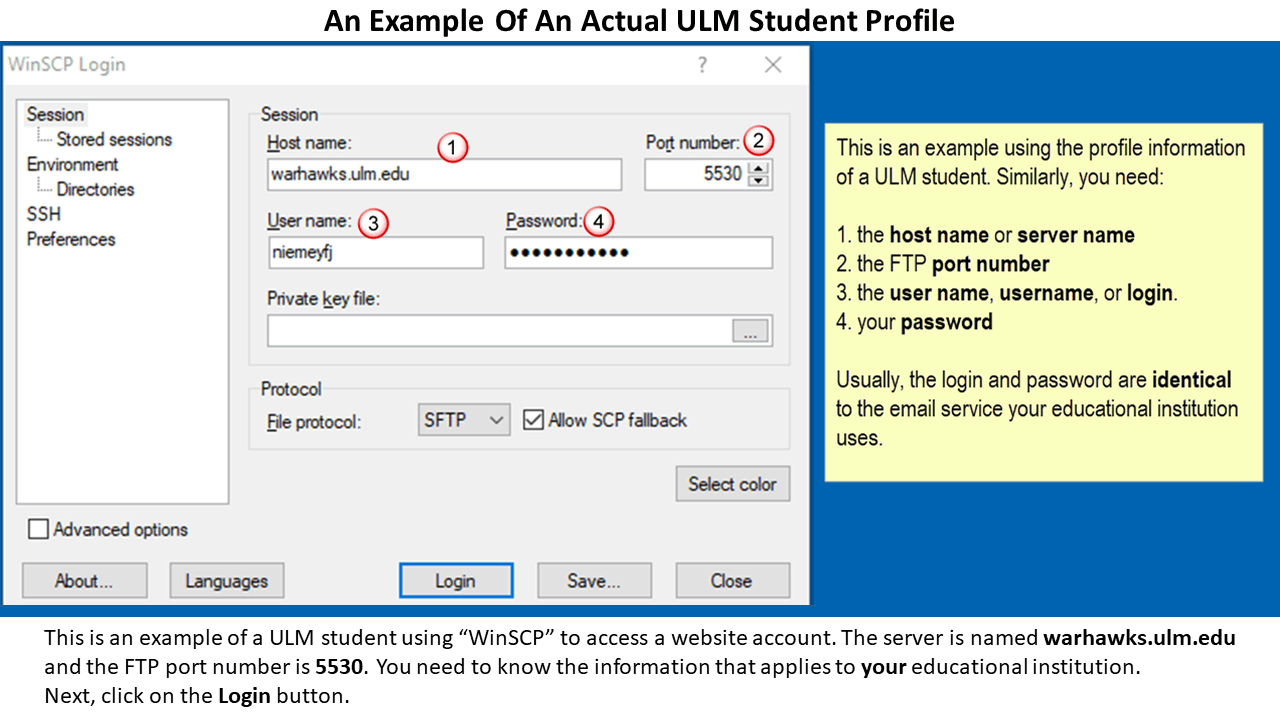
IN this example, this is what a ULM student profile would look like. These settings will only work for one person. Of course, your institutional account would require changing these settings.
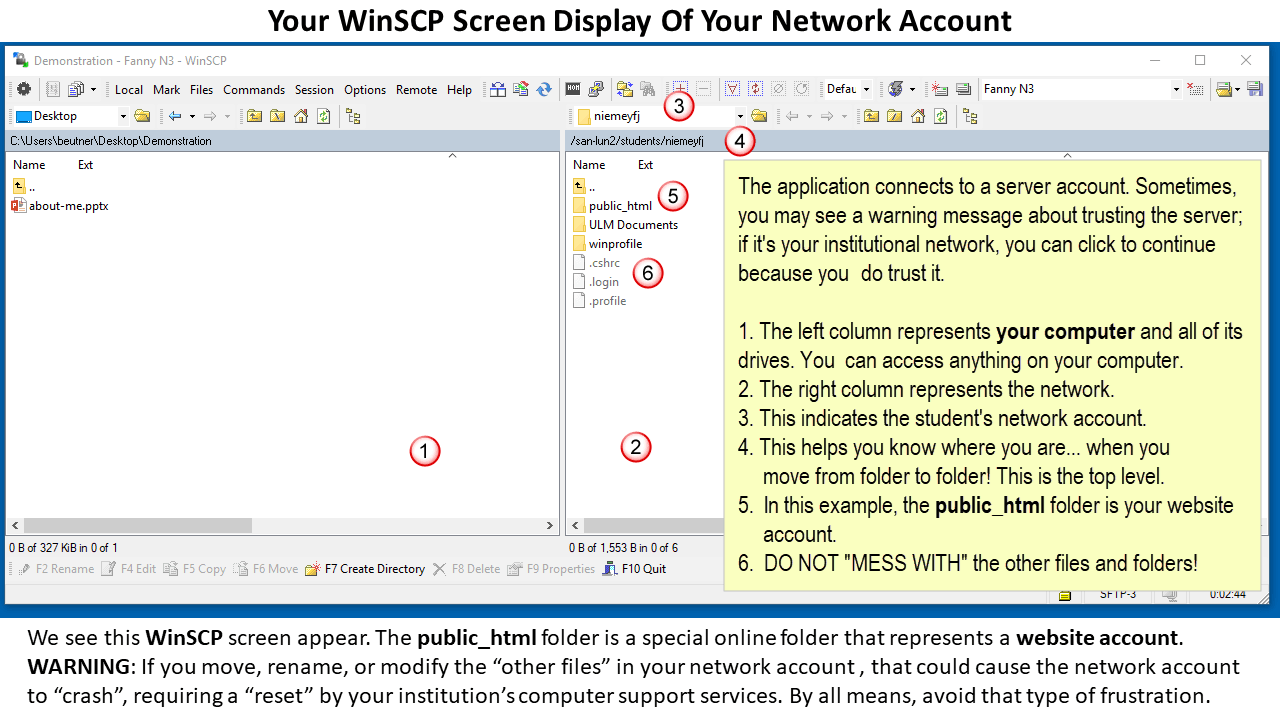
When you login to your network account, you may see error messages and warnings before you see a screen like this appear. As long as you trust the network account, it's fine to continue without worry.
This is the "root" directory or "root" folder of your network account. DO NOT MODIFY the network file settings by changing these folders and files. If you do, you will need to contact a very busy and hard-to-get-to network technician... after you spend hours dealing with compliance procedures. AGAIN: You can disable your network account if you "play" with the "other" "root" folders and files. Avoid that!
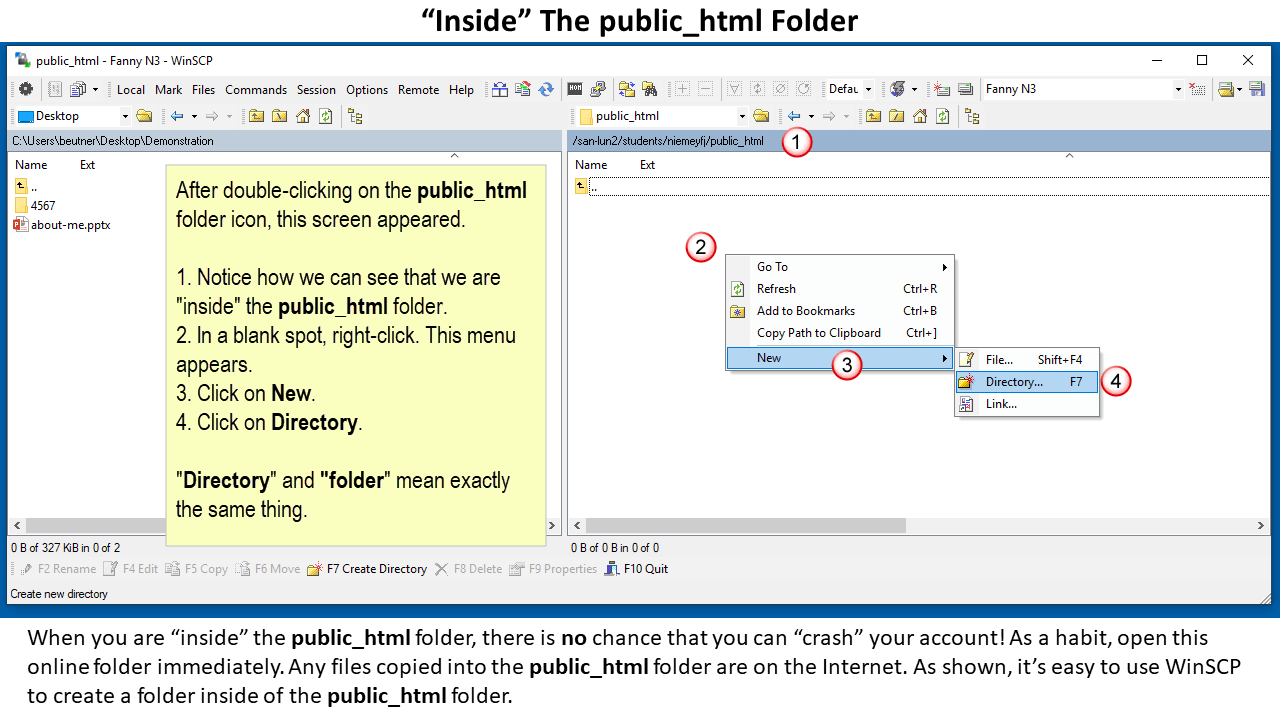
This shows that you have accessed your network account. In this example, we are inside of the "special folder" called public_html to get ready to create a new folder. ("Directory" = "Folder")
It is worth noting one more time, when you access your network account, as a habit, immediately, without delay, double-click to open the public_html folder. That folder is a safe place where you can't disable your network account accidentally!
This is how to create a new folder inside of your public_html folder.
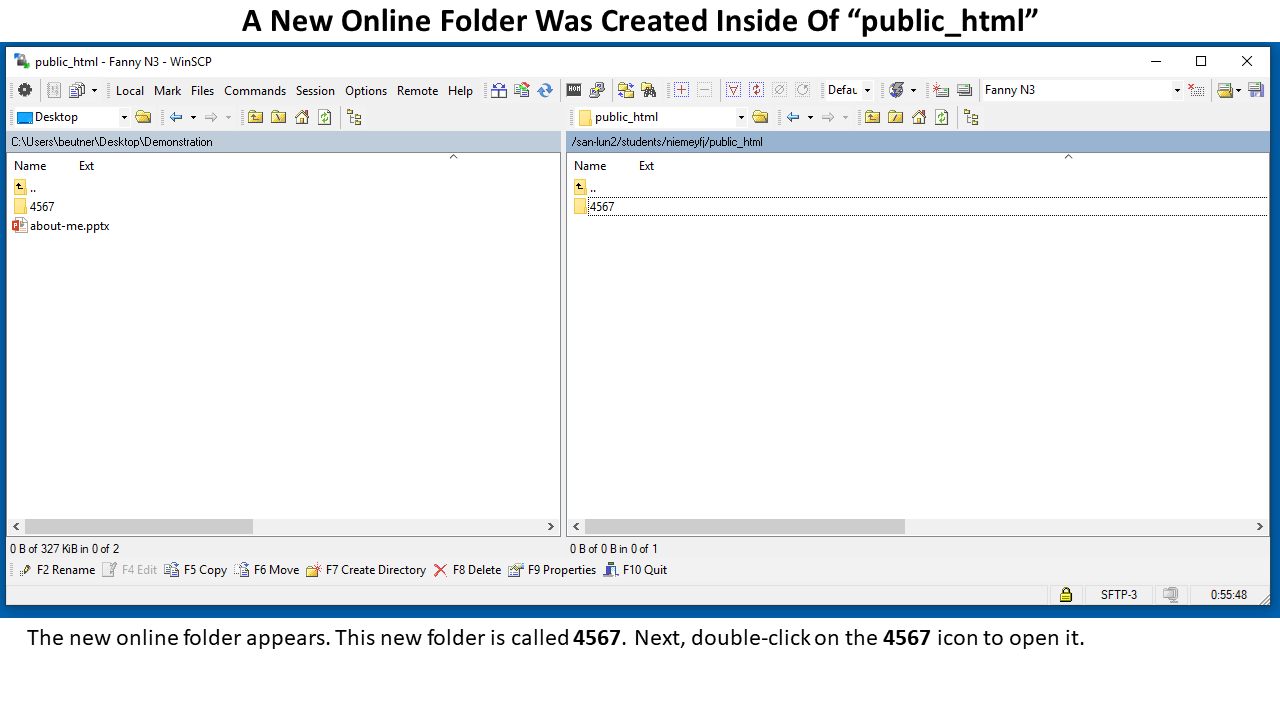
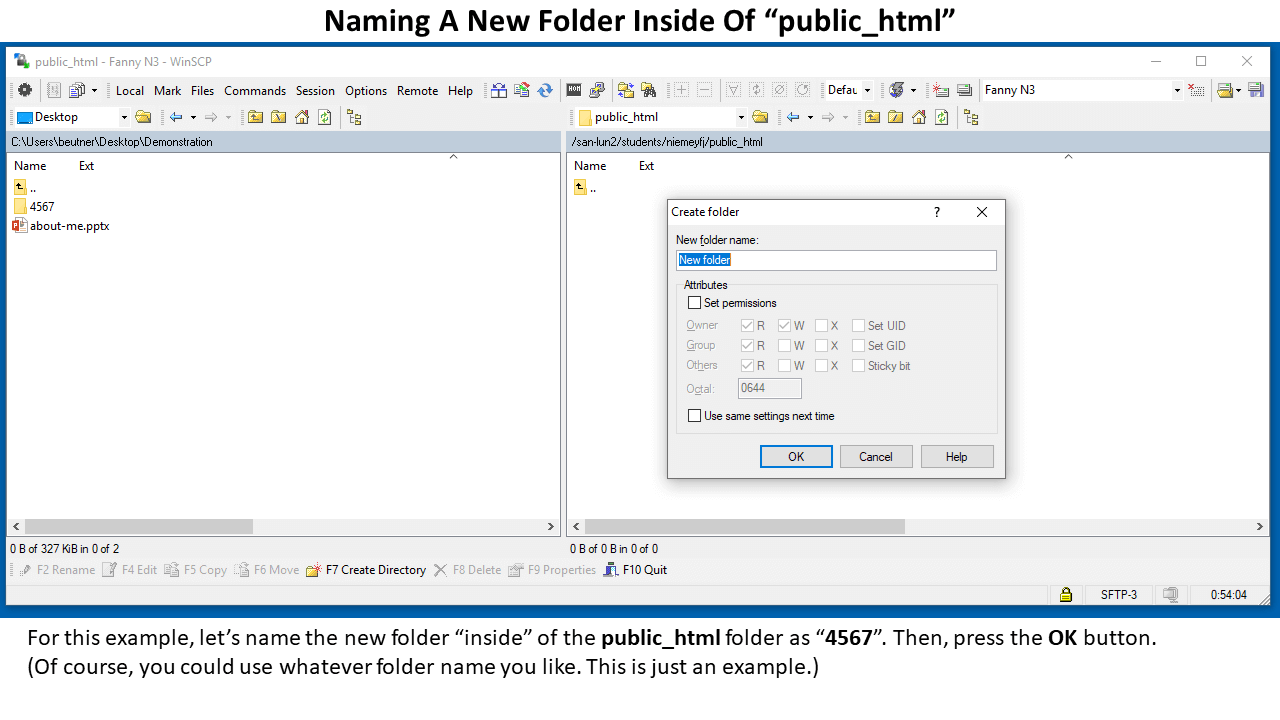
An online folder was created inside of the public_html folder using WinSCP. It's named 4567 after a course number.
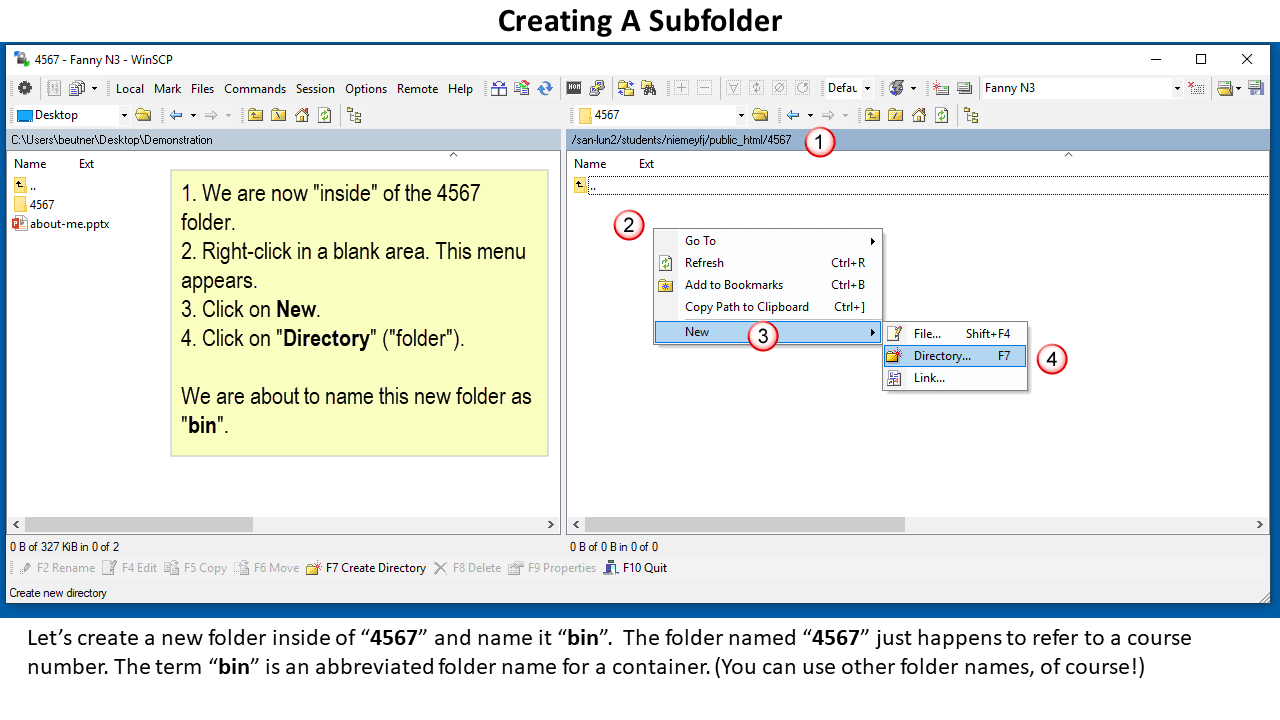
You can create a folder within another folder, as shown in this example.
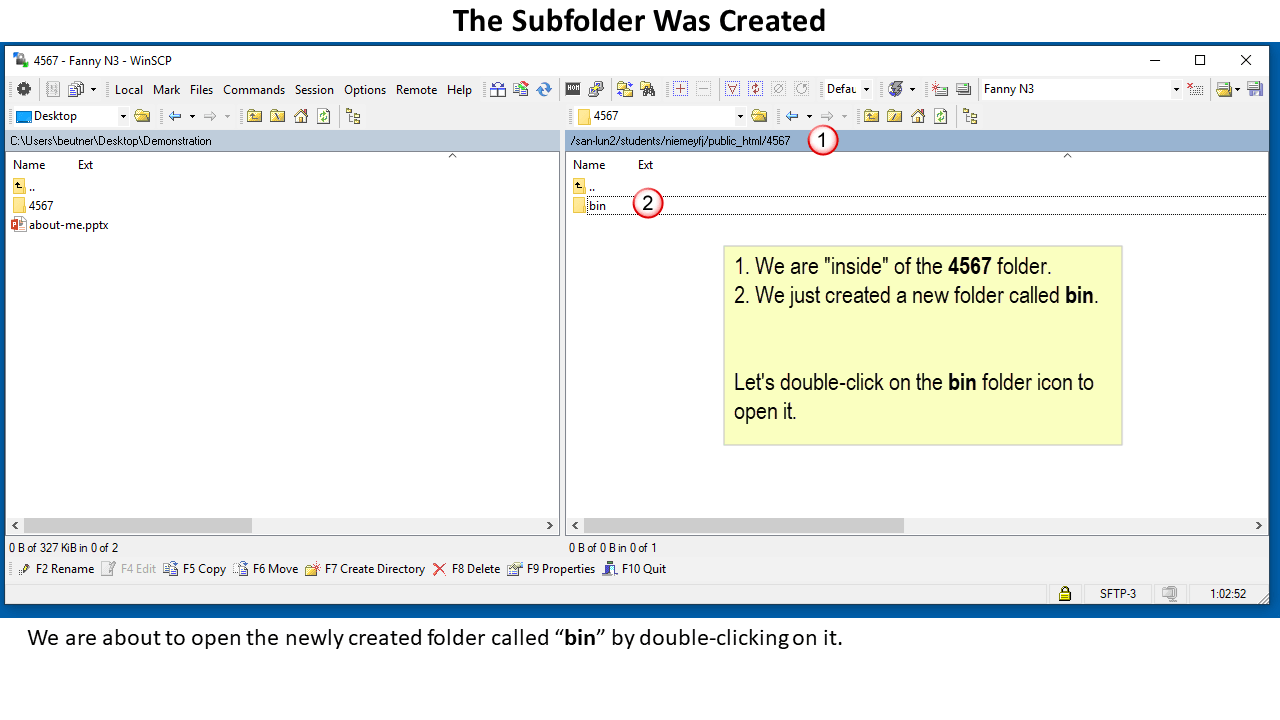
Great! A new subfolder was created. The bin folder is "inside" of the 4567 folder.
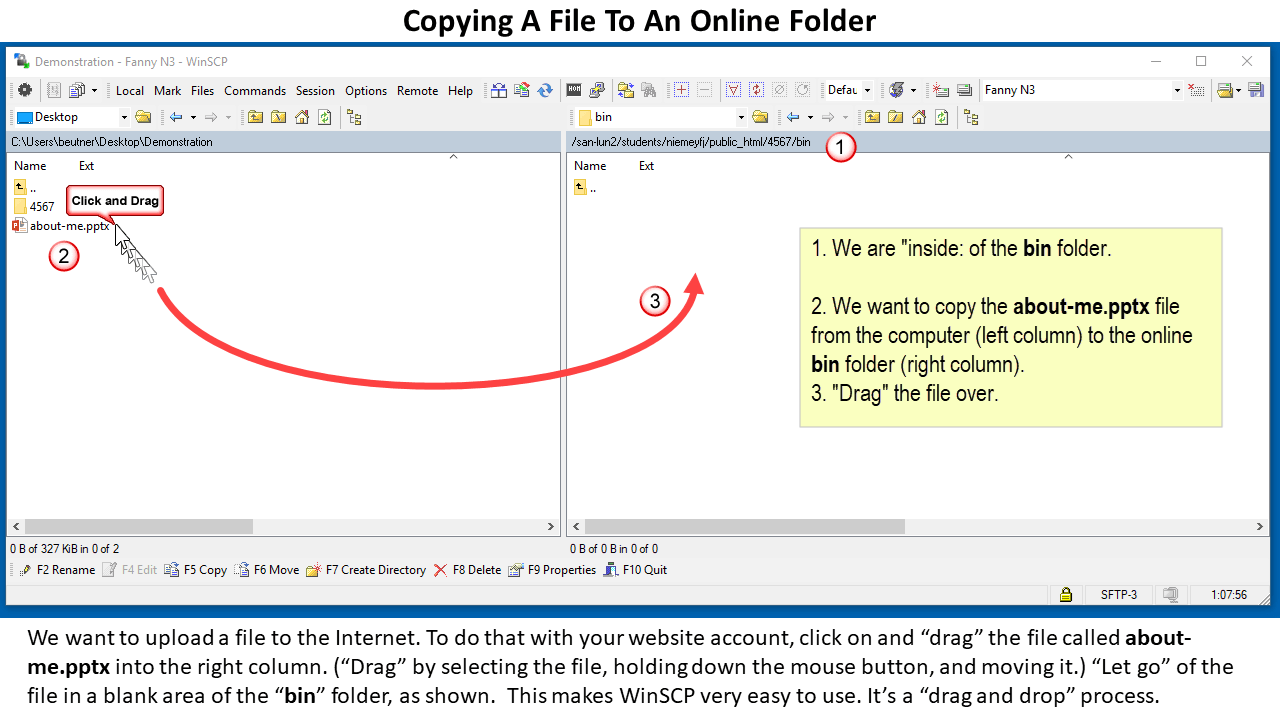
The goal here is to copy a file from the "left column" (representing your computer) to the right colum (representing your network account). It's a process of "drag and drop".
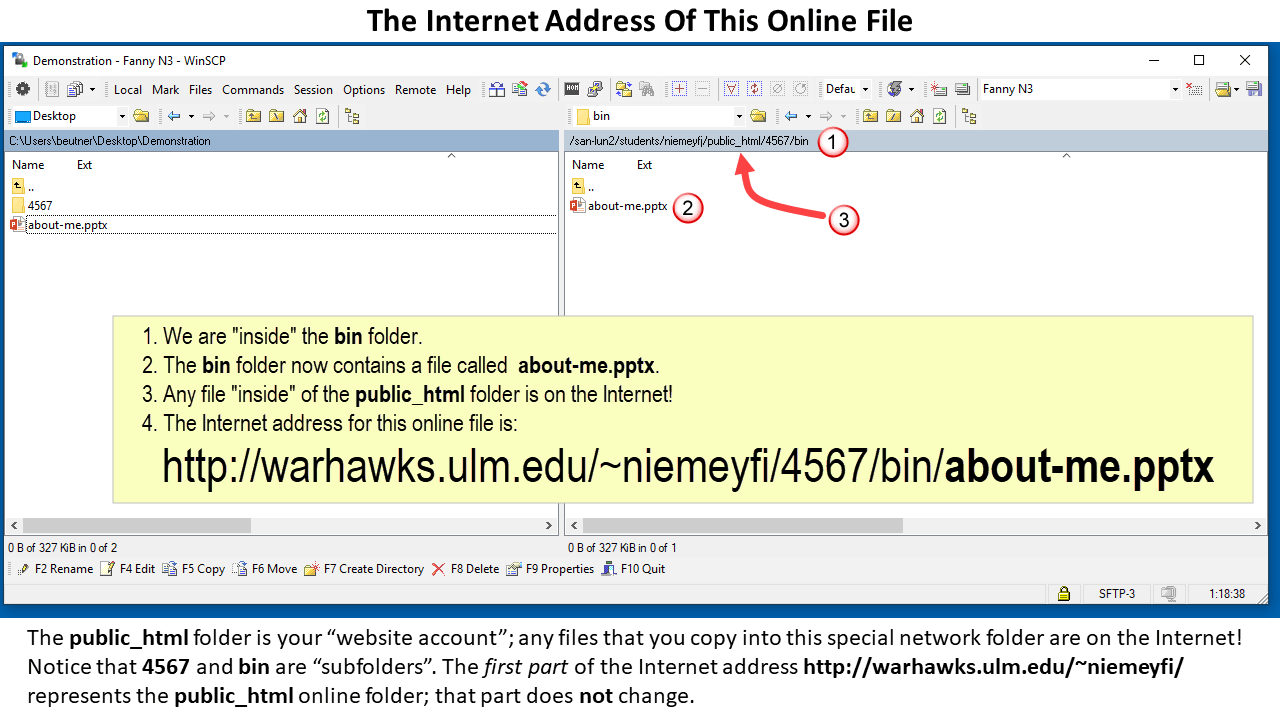
Success! The WinSCP application allowed you to copy from your computer to your network account.
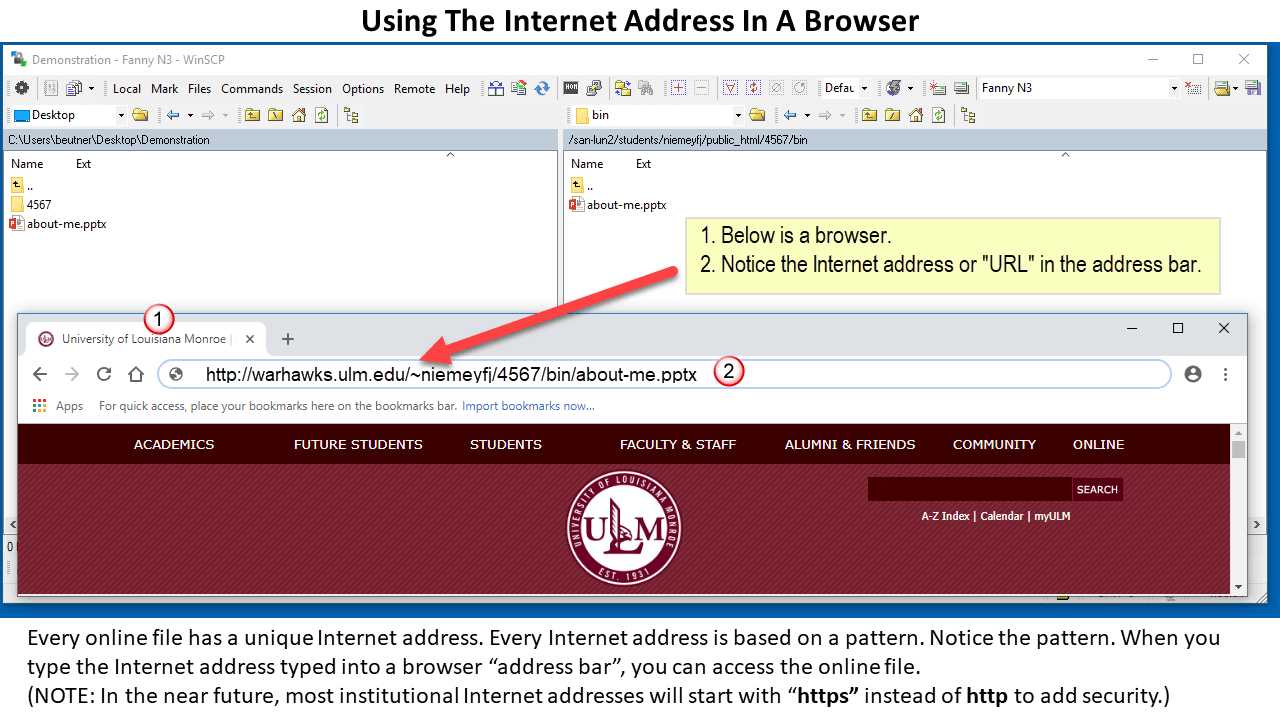
The Internet address allows you to access a file on Internet. Every online file has its own unique Internet address. When you "link" to an online file, you use the Internet address ("URL").
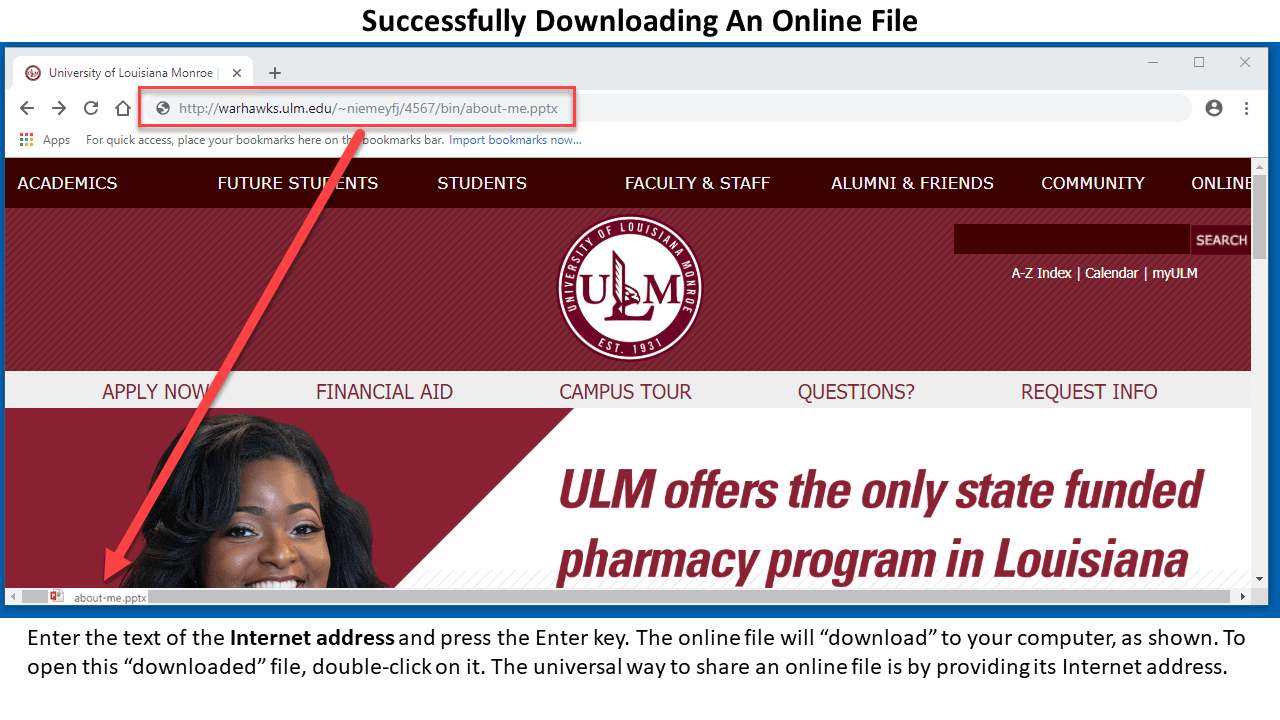
The Internet address works in any browser, in any popular application, on every device. (NOTE: This Internet address will not work in the future when the student's website is deactivated after graduation. However, the files and folders can be easily transferred to a different website account. )
The Internet address of YOUR online file, using your own institutional website account, will be DIFFERENT but the concepts and procedures are the SAME.
Note: This is the "manual way" to get files on your website account so that you can access them. However, you may want to consider creating a webpage/website with the free "Mobirise" application; many people prefer to create an integrated and pleasing experience for linking to any of your files. If you are interested in creating a website in a weekend, start HERE with these video tutorials for using Mobirise. (Hint: This website was created with Mobirise.)

