Use this link to download and install Office 365 Education from the Microsoft official site.
The ULM Help Desk recommends visiting the Office 365 Learning Center prior to installing Office 365 Education.
Having trouble installing? Microsoft maintains a troubleshooting site.
Computers must meet Microsoft's Office 365 system requirements, and have internet access. View the system requirements over at the Microsoft official site.
To access your Office 365 features using a web browser, do the following:
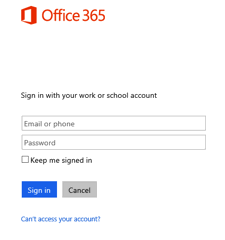
1. Launch a Web browser and go to https://outlook.office365.com/owa
2. Enter your ULM email address and password and click Sign In.
3. After signing in, you’ll see a welcome screen. This will display the licensed features you have available, including email, calendar, OneDrive, and other features of Office 365. You may also have access to Microsoft Office applications.
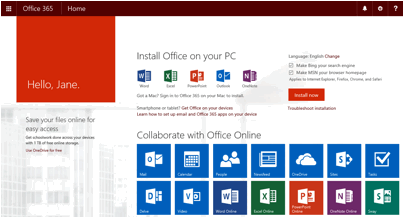
The “Install Now” button will install Office Professional to your device. You may install this on up to 5 devices concurrently.
Below the Office installation button are a series of “tiles”, which provide access to the Office 365 applications and online versions of Office (Word Online, Excel Online, PowerPoint Online, and OneNote). The tiles are explained below:

The Mail Tile will open Outlook Web Access, containing your university email account and content.

The Calendar Tile will open your calendar, allowing you view and schedule events, and email meeting requests to other people.

The People tile will open your Contacts. From here you can manage your contact information, including name, address, email, phone, pictures, etc…These contacts are directly accessible from within the mail, calendar, and Office applications.

The Newsfeed tile will display updates from people, documents, sites, and tags you are following within Office 365.

The OneDrive tile provides web access to 1TB of cloud storage. OneDrive is also already installed on most Windows operating systems from Windows 8 up. By signing into OneDrive with your ULM account, you’ll be able to save and share documents and pictures within Office 365. These can be attached to Office applications or accessed via the OneDrive web interface.

The Sites tile will connect you to document libraries configured by ULM. These may include general help information, as well as department-specific sites.

The Tasks tile allows you to create tasks and set due dates. These tasks are then available within the Mail and Calendar tiles to keep you aware of pending deliverables.

The Delve tile shows relevant information, documents, and people that you work with in order to provide visibility into data you may need to be aware of. Similar to the newsfeed, this service uses algorithms to predict data you may need so it’s available.

The Video tile allows you to create video channels within Office 365. Videos can then be uploaded, shared (publicly or privately).

The Office Online tiles provide online versions of the most commonly-used Office applications, including Word, Excel, PowerPoint, and OneNote. These applications provide a web-based method to create and share documents. Documents created online can be edited via the Windows versions of Microsoft Office and visa versa.

Swap is way to create and share interactive reports, presentations, newsletters, stores, and more. Because Sway runs on Office 365, content can be shared to others using web browsers, Windows PC, iPhone, or iPad without any conversion required. Sway will handle the conversion, allowing the end user to see the content immediately.
OWA (Outlook Web App) Help
Setting the correct time zone
Setting the correct time zone prevents/resolves potential issues with calendar appointments. To do this in Office 365, use the following steps:
1. Log into Office 365 at https://outlook.office365.com/owa
2. Click the gear/cog wheel in the top right corner, and select Options.

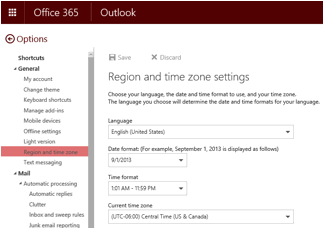
3. On the left side menu, expand General, then click Region and time zone.
4. Set your preferred date format, time format, and time zone. Click Save when finished.
Office 365 provides several methods for users to manage junk mail. For a complete list of options and step-by-step instructions, please see below or visit Junk eMail Settings.
Block or allow (junk email settings)
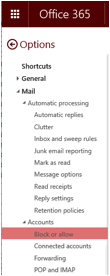
Use the Block or Allow settings to help control unwanted and unsolicited email messages by creating and managing lists of email addresses and domains that you trust and those that you don’t. To manage junk email settings, select Settings icon > Options, and then select Mail > Accounts > Block or allow.
Block or Allow

Don’t move email to my Junk Email folder
Automatically filter junk email
Safe Senders and Recipients
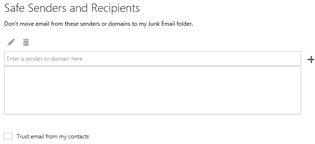
Safe senders and recipients are domains and people you don’t want diverted to your Junk Email folder.
Trust email from my contacts
Blocked Senders
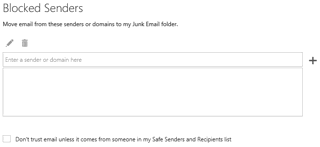
Blocked senders are domains and people you don't want to receive email messages from.
Don’t trust email unless it comes from someone in my Safe Senders and Recipients list or local senders
Safe senders and recipients
Safe senders are domains and people you always want to receive email messages from. Safe recipients are recipients that you don't want to block, usually groups that you’re a member of. Messages received from any email address or domain in your safe senders and recipients list are never sent to your Junk Email folder. However, they may be blocked before they reach your mailbox by junk email filtering settings on the server that hosts your mailbox.
How do I add a sender or a domain?
1. Sign in to Outlook Web App at outlook.office365.com. If the Outlook Web App does not launch automatically, select Outlook (or Mail) at
the top of the page. Or, select the App launcher Office 365 app launcher icon ![]() , and then select Outlook.
, and then select Outlook.
2. At the top of the page, select Outlook (or Mail). Or, select the App launcher icon , and then select Outlook.
3. At the top of the page, select Settings > Options, and then select one of the following:
Block or Allow
OR
Mail > Accounts > Block or Allow
4. To add an entry to Safe senders and recipients, enter the email address or
domain that you want to mark as safe in the Enter a sender or domain here text box,
and then press Enter or select the plus icon ![]() next to the text box.
next to the text box.
5. Select Save to save your changes.
How do I remove a sender or domain?
1. To remove an entry from Safe senders and recipients, select the entry to highlight
it, and then select the minus icon ![]() .
.
2. Select Save to save your changes.
How do I edit a sender or domain?
1. To change an entry in Safe senders and recipients, select the entry to highlight it, and then select the edit icon ![]() .
.
2. Make any changes you want.
3. Select Save to save your changes.
Blocked senders
Blocked senders are domains and people you don't want to receive email messages from. Messages received from any email address or domain listed in your blocked senders list are sent directly to your Junk Email folder.
How do I add a sender or a domain?
1. Sign in to Outlook Web App at outlook.office365.com. If the Outlook Web App does not launch automatically, select Outlook (or Mail) at the top of the page. Or, select the App launcher Office 365 app launcher icon, and then select Outlook.
2. At the top of the page, select Outlook (or Mail). Or, select the App launcher icon
![]() , and then select Outlook.
, and then select Outlook.
3. At the top of the page, select Settings > Options, and then select one of the following:
Block or Allow
OR
Mail > Accounts > Block or Allow
4. To add an entry to Blocked Senders, enter the email address or domain that you want to mark as safe in the Enter a sender or domain here text box, and then press Enter or select the plus icon ![]() next to the text box.
next to the text box.
5. Select Save to save your changes.
How do I remove a sender or domain?
1. To remove an entry from Blocked Senders, select the entry to highlight it, and then select the minus icon ![]() .
.
2. Select Save to save your changes.
How do I edit a sender or domain?
1. To change an entry in Safe senders and recipients, select the entry to highlight it, and then select the edit icon ![]() .
.
2. Make any changes you want.
3. Select Save to save your changes.
Best Practices for Shared Mailboxes – Individual vs. Resource
There are two basic categories of Office 365 mailbox:
1. Individual mailbox (assigned to a specific person)
2. Resource mailbox (assigned to a department or other group)Can represent a department
(e.g. Engineering Faculty)
Individual mailboxes are typically created by ULM IT staff based on user accounts. Because user accounts are intended to represent actual people, this is not the preferred method for creating shared mailboxes.
To create a shared accounts contact the Help Desk with the following information:
Share your calendar
This is the recommended option for someone who needs only to view your calendar. Be aware that sharing your calendar will allow those you share with to view your appointment details. You can choose to grant access to individuals or a group of people to view your calendar.
This section applies if you use:
Microsoft has made available a short video walkthrough that explains how to set up calendar sharing:
Share individual mailbox folders
This is the recommended option if someone needs to access some of your mail (e.g. one or two folders containing information about an ongoing project).
Note: it is not recommended to share your entire mailbox. If you need to grant this level of access to someone, adding them as a delegate is the best option.
Grant a person access to your entire account by making them a delegate
This is the recommended option if you would like to allow someone to accept calendar appointments, move/view/delete mail, or send email from your account on your behalf.
Sharing your mailbox via Delegation
Delegation gives Office 365 user’s permission to access certain features of your mailbox, such as:
If you use Outlook 2010/2013 (Windows):
If you use Outlook 2011 (Mac):
Recipient Limits for Outbound Messages
Issue
Users are limited to a maximum of 1500 unique recipients per day for outbound messages.
Users are also restricted to no more than 500 recipients per mail message.
Workaround
For those users who need to send to larger groups, a distribution group must be used.
Please contact the Help Desk if you require a distribution group for large messages.
Office of
Information Technology
University Library
Room 302, ULM
Monroe, LA 71209
Business Hours
Monday-Thursday
7:30 a.m. to 5:00 p.m.
Friday
7:30 a.m. to 11:30 a.m.
Main Office
PH (318) 342-5015
FX (318) 342-5018
HelpDesk
(318) 342-3333
on-campus ext. 3333